Cubanos from Chef
How hard can it be: Pretty straightforward
Overall Flavor Rating: 5/5
Recipe: From The Chef Show website

What went well:
The sandwiches were absolutely amazing.
We managed to successfully press the sandwiches without owning a plancha.
What went poorly:
We searched all over and couldn’t find anywhere to get Cuban bread.
I don’t know how to read and bought the wrong kind of pickles.
This is part two of a multi-day sandwich adventure. You can read the first part of the adventure here.
After a very successful batch of roast pork, I was super excited to make Cubanos the next day. I awoke the morning after roasting the pork like a kid on Christmas, filled with wonder and awe at what awaited me.
This lasted approximately 20 minutes while I read the ingredients for the sandwiches. Everything on the list seemed really easy to get.
Cuban bread, it turns out, is essentially impossible to find if you don’t happen to live in Cuba, Miami, or New York City. While searching around for where I could get Cuban bread, everyone online said “just swing by a Cuban bakery!” like there should be one on every block.
I searched, and searched, and searched, and there is not a single Cuban bakery within 50 miles of me (and if there is, then they seriously need to work on their online presence). This left me in quite a tough spot, I had no idea what type of bread to substitute.
Online it seems like the general consensus is that you can swap in French or Italian white bread. But, when I went to the grocery store they didn’t have anything that looked even remotely close to what I needed. The only Italian bread that they had that was approximately the right dimensions was Ciabatta and that’s definitely the wrong substitute.
After three different grocery stores and two different bakeries, I gave up and went with a generic looking hoagie roll. It seemed to have the right kind of softness and height that I was looking for. Also worth noting that after 5 stops, it was hard to care too much about what bread I got.
Once I had acquired everything, I raced home to start making sandwiches. Almost as soon as I got home, I realized the recipe calls for half-sour dill pickles and I bought kosher dill pickles. But I was pretty hungry and the roast mojo pork was calling out to me, so I decided the kosher dills would have to do.
The recipe moves pretty fast once you’re in the thick of it, so prepping the ingredients beforehand is a must. The prep itself is fairly simple. You just need to slice up some pickles (a mandolin here made this super easy) and slice up the pork. I suppose if you don't get your ham and cheese from the deli you’ll also need to slice those.

As for the bread, it’s a simple cut down the middle.

It’s not listed in the ingredients, but this sandwich needs a ton of butter. Like a really unbelievable amount of butter. I think we probably used half a stick to make the two sandwiches. I recommend that you melt the butter down completely and then brush it on whenever you need it.

Once everything is prepped and ready to go, it’s showtime. You start by quickly grilling the pork (or in our case, by putting it in a cast iron with a bit of butter). We also threw the ham in with the pork which wasn’t specifically in the instructions, but I don’t regret it.
As you can see, we only had room to grill meat for one sandwich at a time. But, you gotta work with what you’ve got when you have an inconveniently small cast iron.

While the pork was heating up, we buttered the inside of one roll and threw it onto a separate cast iron. I failed to take a picture of this because I was focused on making sure my meats didn’t get too crispy.
Once the meat is hot and the bread has a light golden brown on the inside, it’s time to assemble the sandwich. The recipe is very specific about the order in which you stack the ingredients. It must be:
Pork on the bottom
Ham on top of the pork
Swiss cheese on top of the ham
Pickles on top of the cheese
Then on the top of the roll, slather generously with yellow mustard.

The only part you can freestyle with is the pickle arrangement, ours wasn’t the most beautiful but it got the job done.
When the toppings are ready, you’re supposed to brush the whole thing down with butter and press it in a plancha. We don’t own a plancha, so we took a page out of J. Kenji Lopez-Alt’s book and pressed the sandwich one side at a time using a second pan.

Just putting the pan on top wasn’t enough, I had to really press down with the second pan here to achieve an appropriate level of compression. When the bottom side was sufficiently browned, we pulled the sandwich back over to the cutting board to quickly coat the other side in butter, then it was back into the pan to toast.
After a few minutes, the sandwich should be golden brown all over and the cheese should be really nicely melted. Pull it off the heat to a cutting board and admire your work.
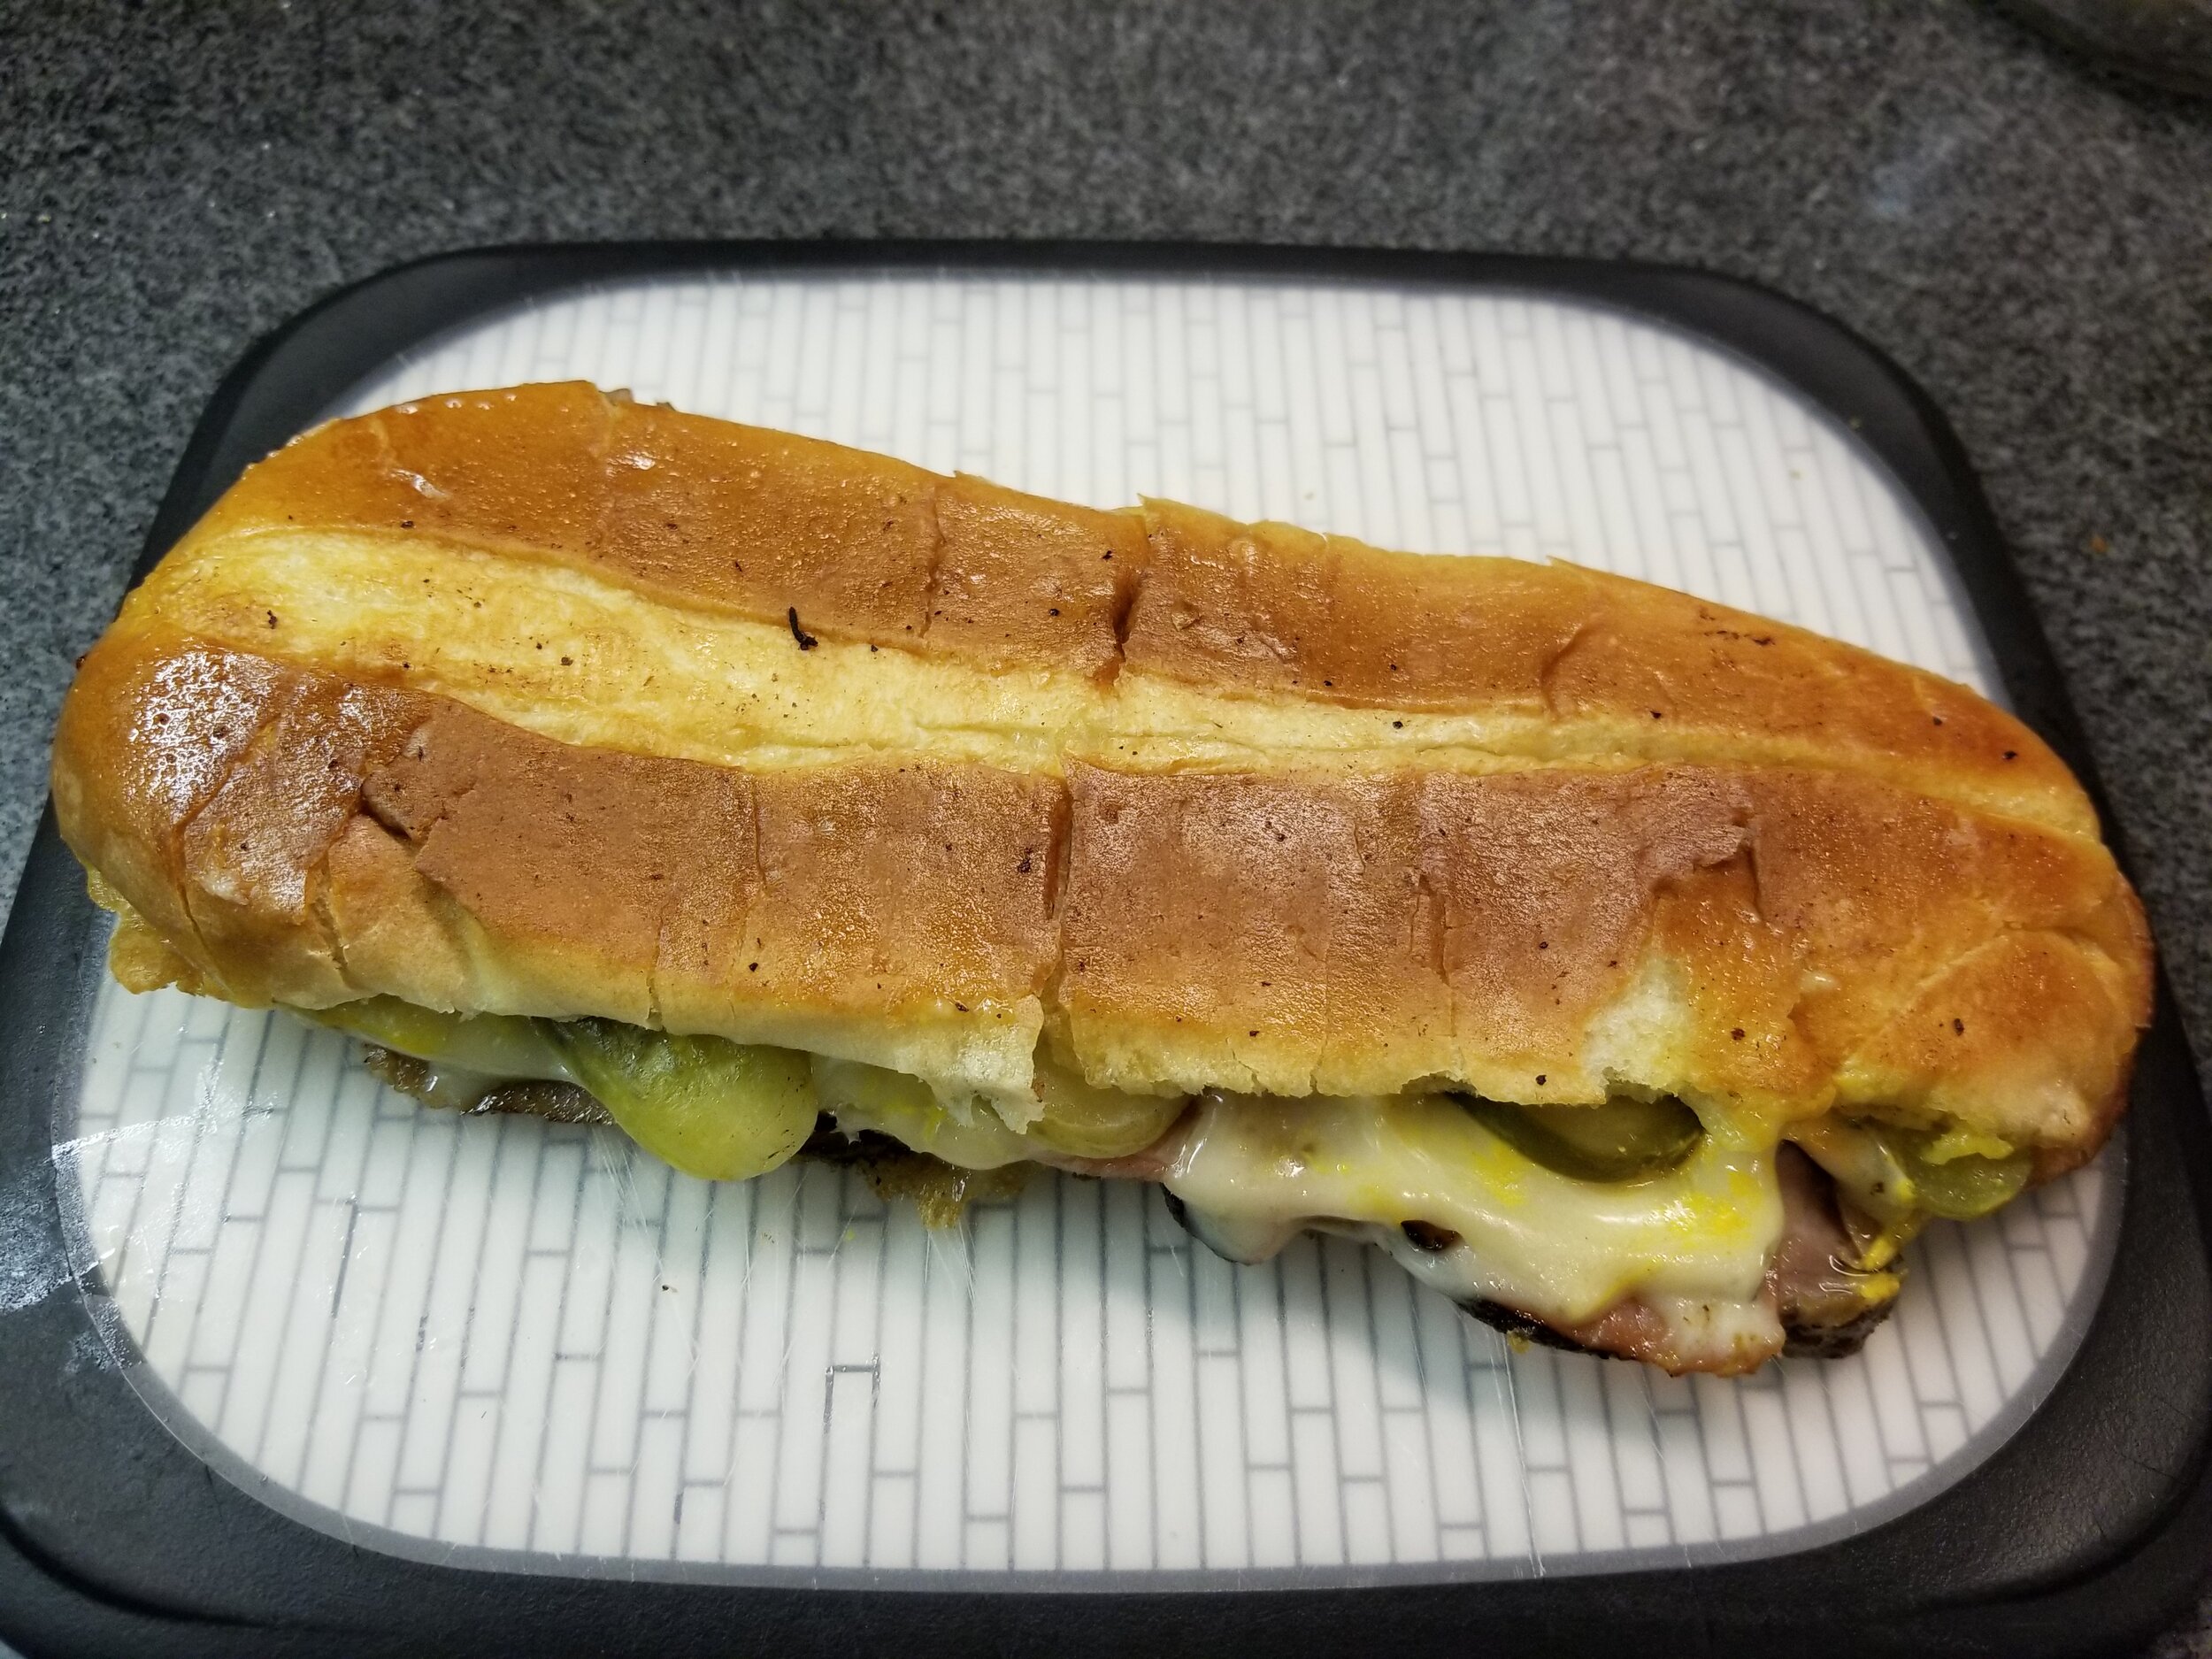
Then, cut the sandwich in half and appreciate the glorious cross section.

Then eat the sandwich immediately. Seriously, don’t delay. If you’re making it for guests, tell them to stop whatever they’re doing and eat this gift from god.
We could only make one at a time, so we made one, split it while it was hot, and then moved onto the second. Both were unbelievably delicious and I can’t explain why I haven’t made these before. Honestly, I’m disappointed in myself, my family, and my friends that we aren’t making these every week. They are an absolute 10/10. I would highly recommend them. Plus, now that everyone is at home all the time, there’s no excuse for why you can’t spend a full day preparing pork for these.